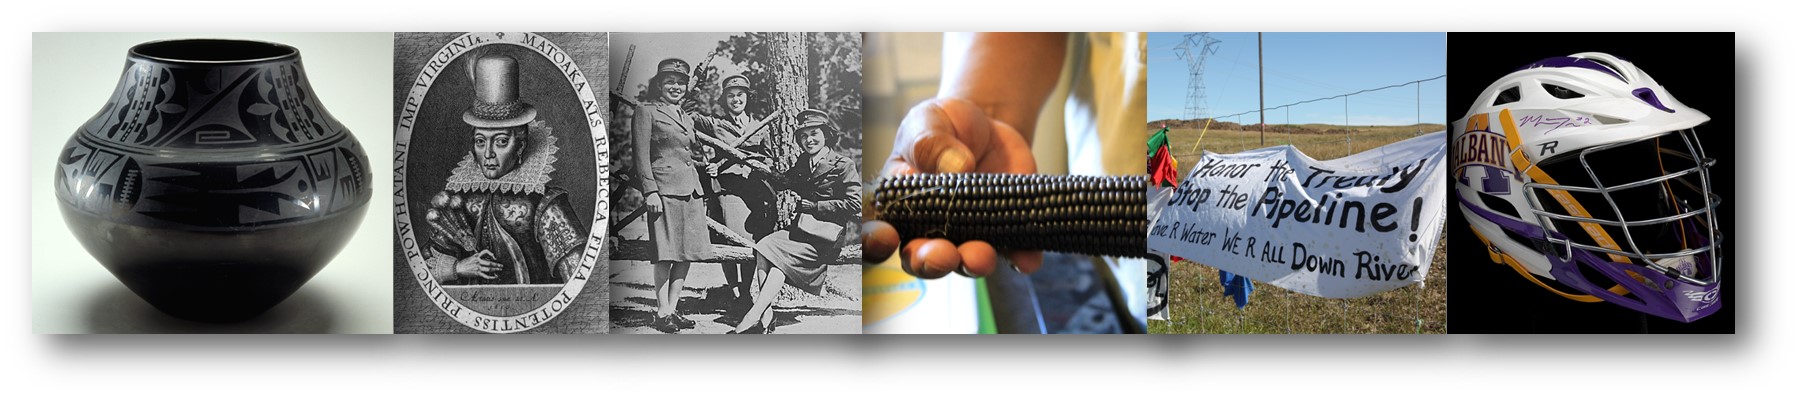
Pottery Creation Process

The beginning of the process is quite simple; first clay would be gathered from a local source which usually was a quarry. This clay was taken out of the ground with a pick or filed off of rocks and then taken home and left to dry in the sun for several days. This clay once dried is submersed in water inside usually a pot and left to soak for anywhere from two to five days. After several more times of completing this process, the solution is worked through a sieve in order to properly purify the mixture from any rocks or unwanted substances, thus leaving a soupy like material. This is left to sit out for several days before modeling can begin, and then a filler agent is added in order to prevent drying and get the perfect consistency for modeling.
This substance is then taken by the artist and is modeled into the shape of the cone which forms the base of the pottery. Then the potter uses a spoon, or the stem of a gourd called a kajape, in order to properly thin and scrape the clay. The artist then wets the kajape and works the clay base which then prepares it for more layers of clay to be added on, often referred to as coils which start to form the actual pottery. Coiling is a traditional step in this process but with modernization has been cut out. The use of water, hand shaping, and gradual spinning smooths out the walls of the pottery and really defines the shape. After drying for a few days this process is repeated to further thin the walls of the pottery.
The pottery is then left for another 2 to 4 days, this allows the pottery to be ready for sanding. Very fine sandpaper is used all over the outside and inside of the pot and then rubbed in a wet cloth, which moves the clay around the pot in order to even it out and fill in indents. A “slip” is then applied to the pot in order to create and better surface and texture. This “slip” is clay and water that is consistent to the creamer that you would put in coffee and is applied with a cloth or a homemade brush. After a few applications of some slip the artist takes a polished stone to rub the pot, which is called burnishing. When this process is completed a small amount of grease or oil is layered on which results in a reflective glaze. The artist then uses the same clay like mixture as the slip as paint. This is put on by a small brush traditionally from a yucca plant that is frayed at the end or with whatever an artist can find in order to properly paint. It is important to note that nothing can be erased once starting, without having to reburnish the whole thing again. There are many other ways to also design the pottery such as carving on the pot or an imprinted clay image.
The last part of the process and probably the most important is the firing of the pottery. This is important because if any air pockets or impurities in the last few days work then this will render the pottery unusable because it will not properly come together. The artist sets up a platform and puts flammable materials underneath, which almost always was wood. Then they would stack the pot on top of the platform, surround it with metal sheets, or if this was in an oven this step could be skipped, then lighting the fire. This creates the classic red style pottery. In order to create the black on black pottery, one would enclose platform and pottery in the same style but plug any holes avoiding air from getting in. These holes normally were plugged with animal feces or mud. This then allows the soot from the fire to become engrained within the pot giving it a black appearance. This then concludes the whole process!